Showing posts with label 3D printing. Show all posts

Wednesday, September 16, 2015

3D Scan with Kinect

[Warning: Non-Python, Non-Network Engineering related. But I think it is fun. :)]

[9/21 Update: I received a scan with Kinect connected to a PC with dual GPU last week, printed out that model  and attached the result pictures at the end]

I received my Windows Kinect Adapter and here is the workflow I followed to go from 3D scan to a 3D printout on the 3D printer:

1. Download and install the Kinect SDK.

2. Originally I was going to use 3D Builder from Microsoft, but apperantly the scanning function is missing on the Windows 10 version. Luckily, KScan3D is free and available, so I used it.


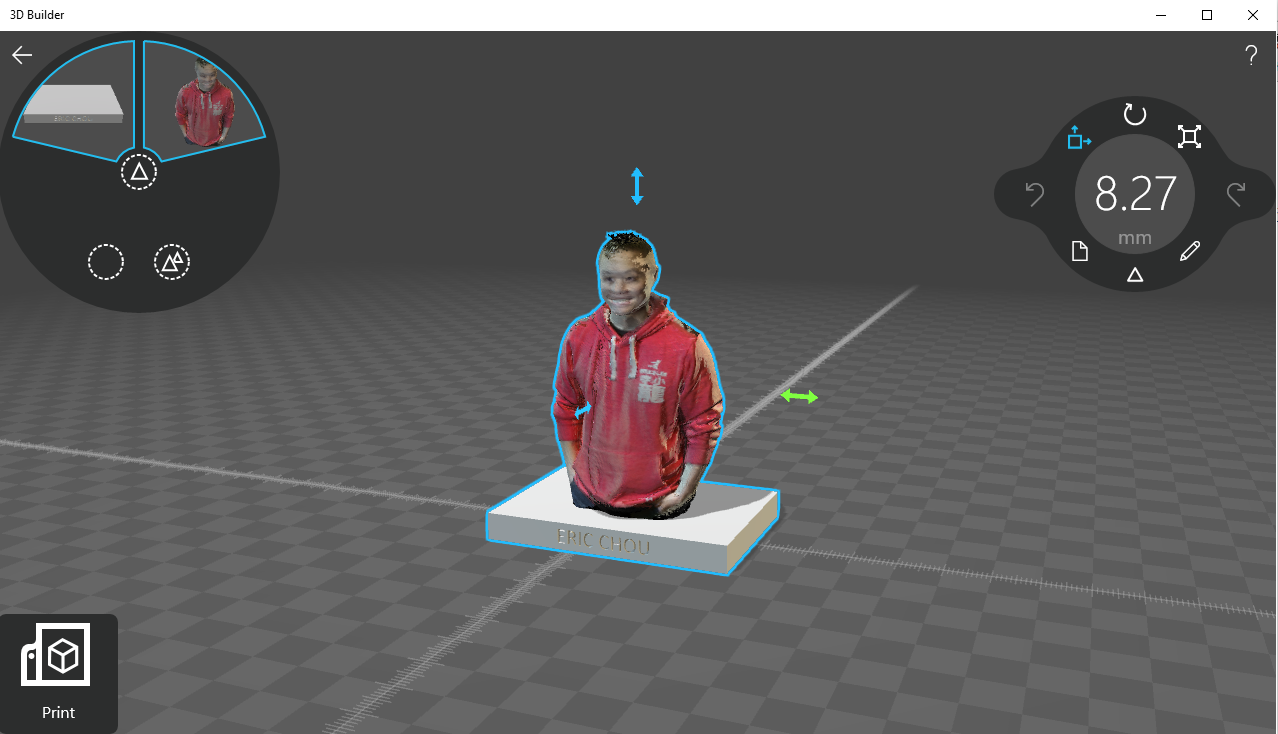
3. Then I use 3D Builder to correct the image, slice it, and put a base to print better, save it as stl file. Note that because I was by myself and rotated myself instead of the scanner, the top of my head was empty, so I put a hat on top of my head.


4. Finally, I used MakerWare to open the file and save it as x3g on the SD card to print on the Replicator 2. To save time, I shrink the size so it can print in 30 minutes. 


5. I should have used support on the hands, or use support, but here is the final print:


I will be the first to admit it is a bit creepy to see yourself printed out, but hay, it is also very cool!


Happy Making!

[9/21 Update: Kinect + Windows 8.1 3D Builder Scan connected to PC with dual GPU]


Friday, August 21, 2015

3D Object Mesh with Windows 3D Builder

So lately I am obsessed with 3D printing again. I was watching the 3D Builder User Manual on Channel 9 yesterday and listening to 'Talk Python To Me' this morning, a podcast that I enjoy listening to. So I decided to do a 3D object mesh using the Python logo and 3D Builder.

3D Builder is a pretty awesome tool, it is free for Windows users and can be used via touch or traditional mouse. It also has a object correction tool tied in to Azure backend to make sure your model is printable. All the steps below are illustrated in the 4th segment of the 3D Builder User Manual so I won't repeat it here.

Final Product (steps below):


Here is an time lapsed video for the initial stage of the prints (2 more closer look videos at the end of page):


The awesome Python logo file was downloaded from Thingiverse here, by Brian J. Geiger.

Here are the simple steps:

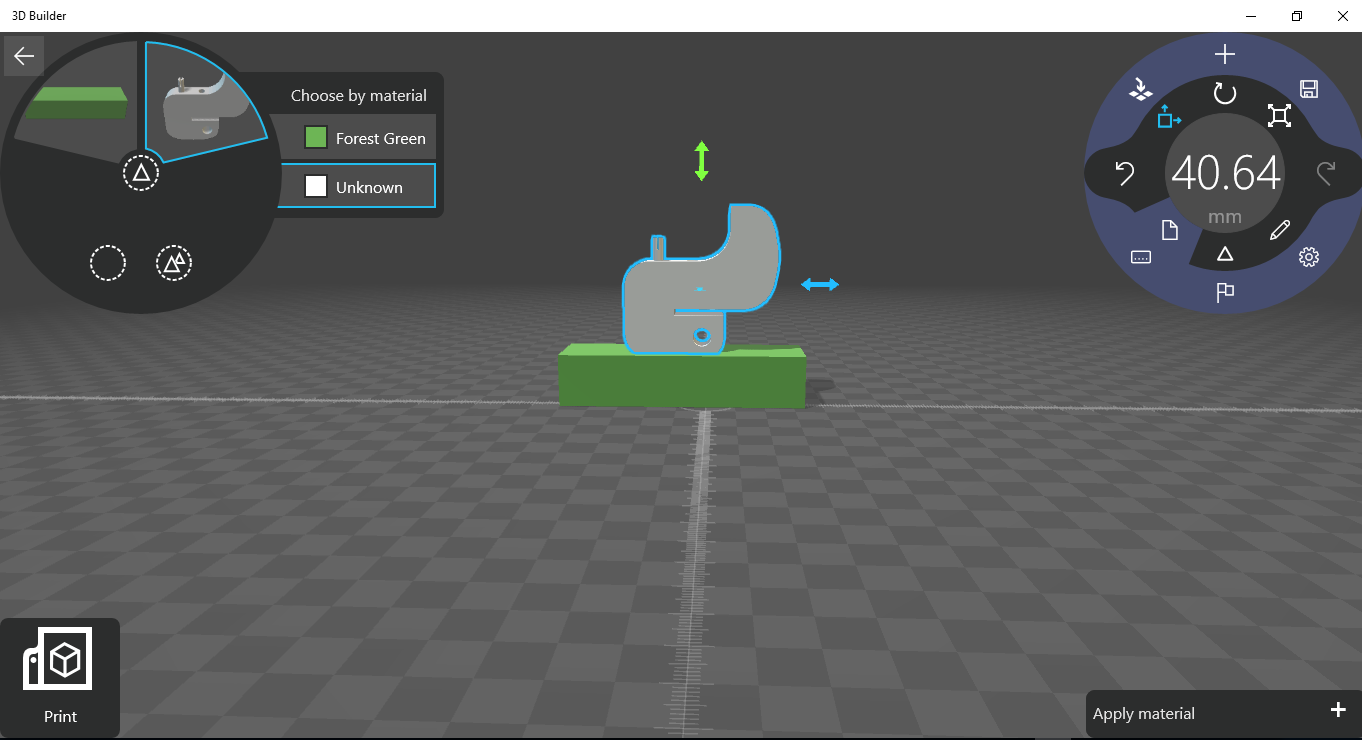
1. Import the base and stretch it:


2. Add Python logo and rotate it 90 degrees:


3. Merge the two objects (notice on the top left corner it is now just 1 object):


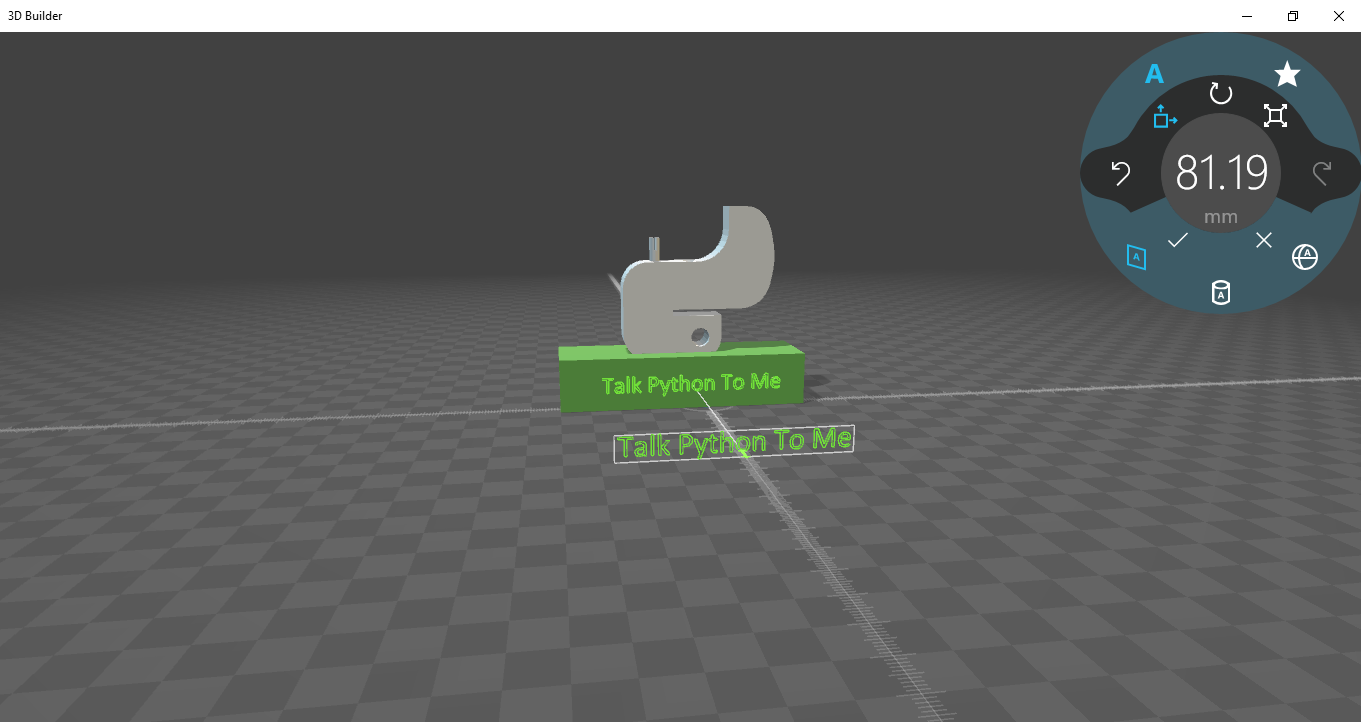
4. Add embroilment:


5. Here is a pretty cool part for Windows, if your 3D printer is one of the supported ones (like my PrintrBot Simple), you can just File -> Print like a regular 2D printer.


3D Builder is a very cool entry level 3D building program that is easier to learn and use than some of the other CAD programs. Best of all, it is free with Windows 8.1 and 10!

6. Because the time lapsed videos are so cool, I took two more while making another model:


Happy Making!


3D Printing Resources

My friends and family know I have been a fan of 3D Printing ever since I saw a demo from MakerBot back in 2012. I proceed to purchase a Replicator 2 in 2013, I had some frustating experience with Replicator 2 that I had to replace the thermal coupler before I can make 'any' print. Hardly the experience you would expect from a $2,200 device that is labeled as 'click and print'.

I have been printing stuff on and off for the next few years, the biggest challenge for me is I cant find a good place to put out the printer. A few weeks ago I moved the printer to the office for the company wide Hackathon and it rekindle my desire to look dig deeper into 3D printing again.

Here are some of the resources that I find useful:

General Knowledge:
3D Printing Essentials from Microsoft Channel9
Make's Yearly Guide to 3D Printing (2015 link here)

Software:
3D Builder User Manual from Microsoft Channel9

Print Sharing:
Thingiverse

3D Printers:
MakerBot
PrintrBot

3D Model Searches:
https://www.yobi3d.com


Friday, August 7, 2015

Miscellaneous Projects Page

I am keeping this page as a track record of some of the miscellaneous projects that I have done since I am beginning to loss track of them:

RasPi Home Security Cam


E-Ink Conference Badge


BeagleBone Black


Blinky


Pi Cases


2-Wheel Robot Chassis


Friday, September 6, 2013

Replacing Thermal Coupler on MakerBot Replicator 2 [non Python nor Network Engineering]

Disclosure: This has nothing to do with Python nor Network Engineering but to help other MakerBot Replicator 2 owners who might be replacing the Thermal Coupler like I had to.

Background and a bit of Rant:

I was really excited when I got my MakerBot Replicator 2 back in June. I took it out of the box, followed all the unboxing instructions really closely, then proceed to set up the machine following the instruction line-by-line to setup the board and stuff.

When I try to print a sample from included SD Card, it gave me an error of 'Temperature Reading Error' and I couldn't proceed. Hum.. ok, that sucks, a little bit of research online yields many results, most of which were solved by turning the printer over, open up the motherboard cage, either strip the cables and re-attach to the motherboard with the screws or just re-attach the cables directly. For a device that cost more than $2,000, the last thing you would expect is having to muck with the motherboard when you first open it up. But I guess you have to do what you need to do. So I did that, it worked for a bit, then it would crap out again. For example, I was able to print the chains example without problem, but it would give the error again on the next project, I would turn the unit over again, re-attach the cables, it would work for 1 project then crap out. Rinse and repeat.

I proceed to open a case with MakerBot support, case 122974. They were nice and ship me the replacement part, and attach the instruction. Unfortunately, the instruction were all in text without pictures. I waited until the replacement came, hoping that it would be self-explainatory. The part came and I was no closer in knowing how to replace the part.


I asked for a bunch of pictures, attach a bunch of pictures, asking a lot of questions, even spoke to Dave over the phone. In the process, I found out that my unit was shipped without the active cooling duct to begin with [I know, WTF, right?]. The support staff, Joseph and Dave, were really nice and helpful, but it still sucks. Long story short, I got both replacements and figured out how to replace both. They are not hard, but really, they need to give you pictures or videos.

Here are the Instructions with my Pictures:

1. Here is a picture of the extruder (the metal head that melts the plastic):


2. You need to unscrew the active cooling duct screws in order to bend back the part that holds the cooling duct, note that I was missing this part all along but did not know until later.


3. Turn the unit to the side so you can see the bottom of the extruder, there were two screws holding the part to the bar. Unscrew them will free up the extruder.


4. Cut the cable tie that is attach to the top of the extruder and peel them off, make sure you did not cut any of the cables.


5. Here is the end that is attached to the extruder.


6. Here is the end that is attached to the motherboard, both cables should attach to the section labeled A and the yellow lead should be at the outer edge.


7. As mentioned, I was also missing the active cooling fan duct. Fortunately, this was just a snap in. These two pictures were from Joseph in MakerBot support.


8. After putting everything together, it works! Whew, all that work. I printed one example from the MakerBot instruction:


Then celebrated by printing Thingiverse Winterfell, http://www.thingiverse.com/thing:39680. This is pretty awesome.


9. And some dudes from Game of Thrones, http://www.thingiverse.com/thing:92172/#files.


Alright, that was it. I hope this help the next guy who had to do this. Despite all this, I am still a fan of the MakerBot unit. I have spent all of my free time watching, learning, and printing the last two days since I fixed the ting.

Happy 3D printing!