Showing posts with label Python. Show all posts

Sunday, December 27, 2015

Anaconda Environment and VirtualEnv Management

Anaconda Python from Continuum is a great tool. It is easy to install and get rid of a lot of the headache of package installation and management.  It is one of the reasons Python has a big footprint in the Scientific Computing and Data Science circle, in my opinion. I enjoy their one-installer-for-all-platform especially and happily traded in my 'pip' commands for 'conda' commands (for more information click here). Anaconda is my default Python interpreter on multiple machines.

There is only one complain, working with Python VirtualEnv is different when you have Anaconda Python as your default Python interpreter. Doing a quick search for 'Anaconda Python VirtualEnv' shows a lot of frustration amongst others. Conda places emphasis on reproducibility as all scientific research should, so their recommended way of managing environment is to use the 'conda env' commands.

I don't claim the following is correct, but they work for me.

***** Using the Good Old VirtualEnv for Learning *****

Currently I am going thru RealPython's courses (which are excellent, by the way), and want to create quick VirtualEnv to separate the different packages used in different lessons.

- Find out your Python interpreter path and specify it when creating virtualenv

MacBook-Air:my_code echou$ virtualenv -p /usr/bin/python2.7 test
Running virtualenv with interpreter /usr/bin/python2.7
New python executable in test/bin/python
Installing setuptools, pip, wheel...done.
MacBook-Air:my_code echou$ source test/bin/activate
(test)MacBook-Air:my_code echou$
(test)MacBook-Air:my_code echou$ deactivate

MacBook-Air:my_code echou$ 

***** Use Conad Env for more Permanent Projects *****

I also intend to keep a few Flask environment active for some other projects, which I have elected to use the Conda environments. 

Here are some helpful links: 

http://conda.pydata.org/docs/using/envs.html #Managing Anaconda environments


MacBook-Air:my_code echou$ conda env --help
usage: conda-env [-h] {attach,create,export,list,remove,upload,update} ...

positional arguments:
  {attach,create,export,list,remove,upload,update}
    attach              Embeds information describing your conda environment
                        into the notebook metadata
    create              Create an environment based on an environment file
    export              Export a given environment
    list                List the Conda environments
    remove              Remove an environment
    upload              Upload an environment to anaconda.org
    update              Update the current environment based on environment
                        file

optional arguments:
  -h, --help            Show this help message and exit.

my_code echou$ conda create --name TEST2 ipython (click on the link above for Anaconda package list)
Fetching package metadata: ....
Solving package specifications: ...............
Package plan for installation in environment <locaion>/anaconda/envs/TEST2:

The following NEW packages will be INSTALLED:

    appnope:          0.1.0-py27_0
    decorator:        4.0.6-py27_0
    ipython:          4.0.1-py27_0
    ipython_genutils: 0.1.0-py27_0
    openssl:          1.0.2d-0
    path.py:          8.1.2-py27_1
    pexpect:          3.3-py27_0
    pickleshare:      0.5-py27_0
    pip:              7.1.2-py27_0
    python:           2.7.11-0
    python.app:       1.2-py27_4
    readline:         6.2-2
    setuptools:       19.1.1-py27_0
    simplegeneric:    0.8.1-py27_0
    sqlite:           3.8.4.1-1
    tk:               8.5.18-0
    traitlets:        4.0.0-py27_0
    wheel:            0.26.0-py27_1
    zlib:             1.2.8-0

Proceed ([y]/n)? y

Linking packages ...
[      COMPLETE      ]|##################################################################################################################| 100%
#
# To activate this environment, use:
# $ source activate TEST2
#
# To deactivate this environment, use:
# $ source deactivate
#

my_code echou$ source activate TEST2
discarding <path>/anaconda/bin from PATH
prepending <path>/anaconda/envs/TEST2/bin to PATH
(TEST2)my_code echou$ source deactivate
discarding <path>/anaconda/envs/TEST2/bin from PATH
my_code echou$
*****

So far it works for me, if I find any problems or issues down the line I will update this post. 

Happy Coding! 


Thursday, November 26, 2015

Friday, August 21, 2015

3D Object Mesh with Windows 3D Builder

So lately I am obsessed with 3D printing again. I was watching the 3D Builder User Manual on Channel 9 yesterday and listening to 'Talk Python To Me' this morning, a podcast that I enjoy listening to. So I decided to do a 3D object mesh using the Python logo and 3D Builder.

3D Builder is a pretty awesome tool, it is free for Windows users and can be used via touch or traditional mouse. It also has a object correction tool tied in to Azure backend to make sure your model is printable. All the steps below are illustrated in the 4th segment of the 3D Builder User Manual so I won't repeat it here.

Final Product (steps below):


Here is an time lapsed video for the initial stage of the prints (2 more closer look videos at the end of page):


The awesome Python logo file was downloaded from Thingiverse here, by Brian J. Geiger.

Here are the simple steps:

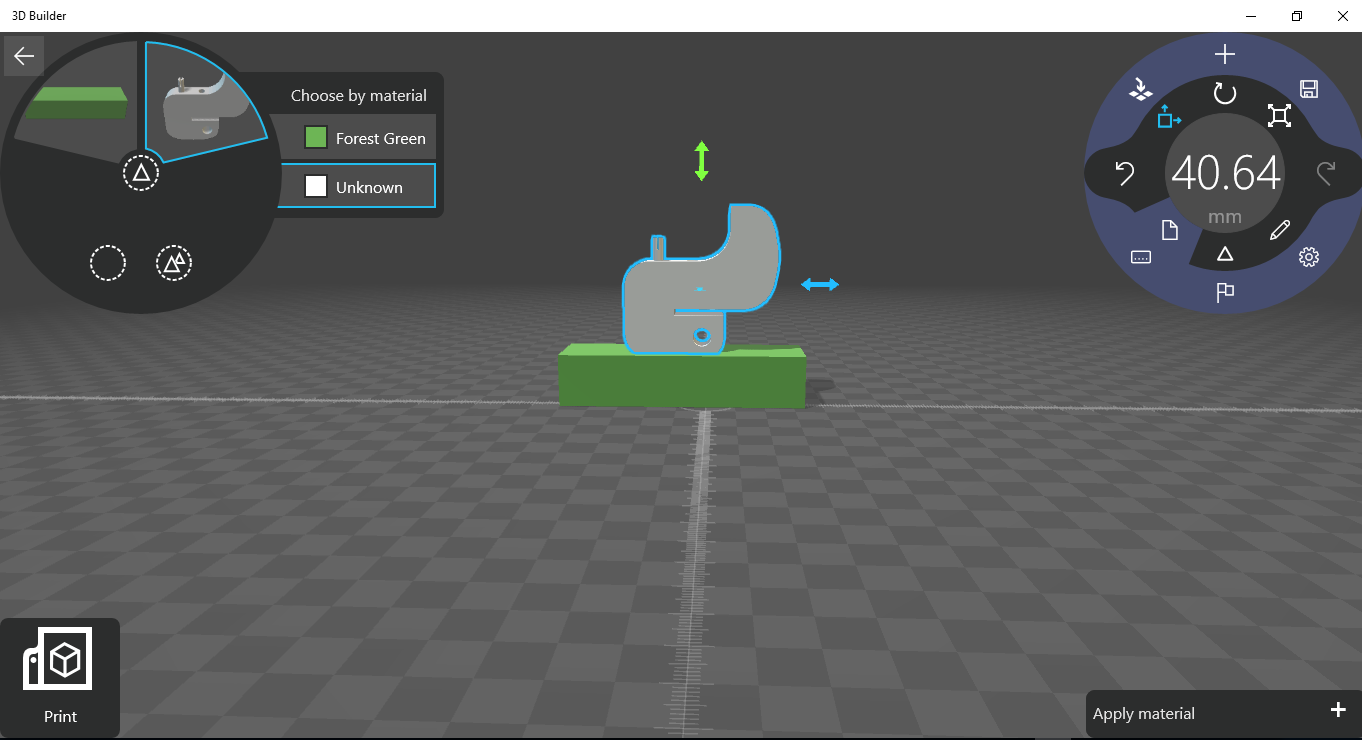
1. Import the base and stretch it:


2. Add Python logo and rotate it 90 degrees:


3. Merge the two objects (notice on the top left corner it is now just 1 object):


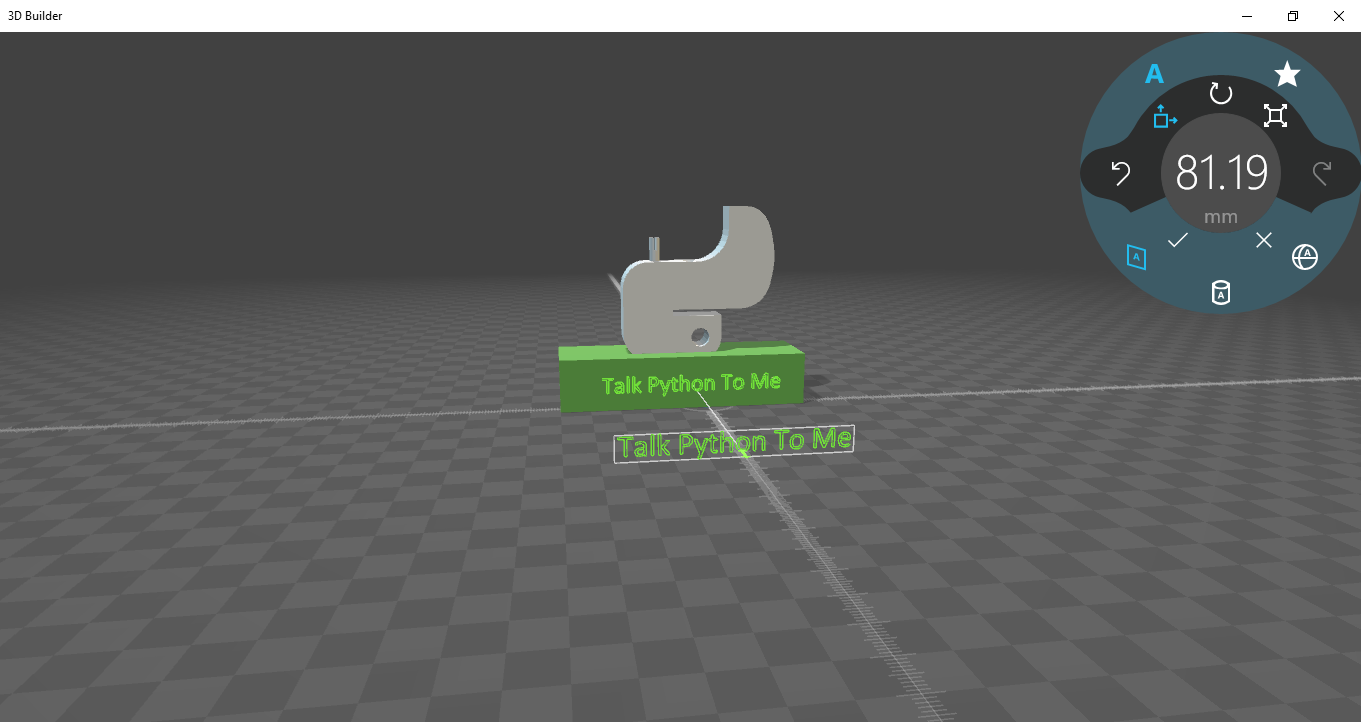
4. Add embroilment:


5. Here is a pretty cool part for Windows, if your 3D printer is one of the supported ones (like my PrintrBot Simple), you can just File -> Print like a regular 2D printer.


3D Builder is a very cool entry level 3D building program that is easier to learn and use than some of the other CAD programs. Best of all, it is free with Windows 8.1 and 10!

6. Because the time lapsed videos are so cool, I took two more while making another model:


Happy Making!


Sunday, July 19, 2015

LittleBits CloudBit with Python Requests - Part 2 Input and Output

In part 1 of the blog, I gave an example to get started on the LittleBits CloudBit and query the device status. In part 2, let's look at how to get input and output from the CloudBit. In its current iteration, there is only one physical input and one physical output.

In my setup I have an 'i3 button' as the input and 'o9 bargraph' as the output:


In the v2 documentation, there was no specific documentation on input, just output. 


After opening a case with LittleBits, I was given the pre-release v3 API documentation (Thanks! Theodore from LittleBits): 


Following the example on the page, the input and output sample are below (note the different v3 endpoint than v2): 
  • Output
$ curl -i -XPOST -H "Authorization: Bearer <token>" https://api-http.littlebitscloud.cc/v3/devices/<id>/output -d percent=50 -d duration_ms=5000
HTTP/1.1 200 OK
access-control-allow-headers: Authorization, Content-Type, If-None-Match
access-control-allow-methods: GET, HEAD, POST, PUT, PATCH, DELETE, OPTIONS
access-control-allow-origin: *
access-control-expose-headers: WWW-Authenticate, Server-Authorization
access-control-max-age: 86400
cache-control: no-cache
content-type: application/json; charset=utf-8
Date: Mon, 20 Jul 2015 04:47:37 GMT
Content-Length: 16
Connection: keep-alive

{"success":true}


  • Input (stream)
$ curl -i -H "Authorization: Bearer <token>" https://api-http.littlebitscloud.cc/v3/devices/<id>/input
HTTP/1.1 200 OK
access-control-allow-headers: Authorization, Content-Type, If-None-Match
access-control-allow-methods: GET, HEAD, POST, PUT, PATCH, DELETE, OPTIONS
access-control-allow-origin: *
access-control-expose-headers: WWW-Authenticate, Server-Authorization
access-control-max-age: 86400
cache-control: no-cache
content-encoding: identity
content-type: text/event-stream; charset=utf-8
Date: Mon, 20 Jul 2015 04:49:44 GMT
transfer-encoding: chunked
Connection: keep-alive

data:{"type":"input","timestamp":1437367785035,"from":{"socket":{"remotePort":<port>,"remoteAddress":"<id>","localAddress":"<addr>","localPort":<port>,"id":"<id>"},"server":{"id":"<id>"},"user":{"id":<id>},"device":{"id":"<id>","device":"littlebits-module-cloud","setup_version":"1.0.0","protocol_version":"1.1.0","firmware_version":"1.0.140820b","mac":"<mad>","hash":"<hash>","ap":{"ssid":"<ssid>","mac":"<mac>","strength":<strength>},"settings":{"label":"<label>","input_interval_ms":750}},"is_identified":true},"percent":0,"absolute":0,"name":"amplitude","payload":{"percent":0,"absolute":0}}

Of which, when press the button, the payload percent and absolute value changes accordingly. 


Converting the two Input and Output Curl to Python were not too difficult, thanks again to the awesome Request package: 

  • Output Script

#!/usr/env/bin python

import json
import requests

deviceId = "<id>"
littleBitsOutputUrl = "https://api-http.littlebitscloud.cc/v3/devices/" + deviceId + "/output"
authToken = "<token>"

headers = {"Authorization": "Bearer "+authToken, "Content-type": "application/x-www-form-urlencoded"}

body = "percent=50&duration_ms=5000"

r = requests.post(littleBitsOutputUrl, headers=headers, data=body)
print r.status_code

- Execution

$ python CloudbitOputput.py
200

  • Input Script
#!/usr/env/bin python

import json
import requests, time

deviceId = "<id>"
littleBitsInputUrl = "https://api-http.littlebitscloud.cc/v3/devices/" + deviceId + "/input"
authToken = "<token>"

headers = {"Authorization": "Bearer "+authToken}

r = requests.get(littleBitsInputUrl, headers=headers, stream=True)

for line in r.iter_lines():
    if line:
        result = json.loads(line.split('data:')[1])
        print result['payload']


- Execution

$ python CloudbitInput.py
{u'percent': 0, u'absolute': 0}
{u'percent': 100, u'absolute': 1023}
{u'percent': 0, u'absolute': 0}


Happy Coding!


Thursday, July 2, 2015

LittleBits CloudBit with Python Requests - Part 1 Getting Started

Hi, I found the LittleBits Cloudbit really interesting and did the following screencast showing the few lines of Python code to query the LittleBitsCloud.CC to integrate some programming logic to it.

https://vimeo.com/132463662


CloudBit 1 from Eric Chou on Vimeo.
- Here are the actual outputs that I blurred out in the video (sorry I am a bit new to the screencast software):

$curl -i -XGET -H "Authorization: Bearer <your token>" -H "Accept: application/vnd.littlebits.v2+json" https://api-http.littlebitscloud.cc/devices/<your device ID>
HTTP/1.1 200 OK
accept-ranges: bytes
access-control-allow-headers: Authorization, Content-Type, If-None-Match
access-control-allow-methods: GET, HEAD, POST, PUT, PATCH, DELETE, OPTIONS
access-control-allow-origin: *
access-control-expose-headers: WWW-Authenticate, Server-Authorization
access-control-max-age: 86400
cache-control: no-cache
content-type: application/json; charset=utf-8
Date: Thu, 02 Jul 2015 16:48:44 GMT
Content-Length: 266
Connection: keep-alive

{"label":"<your device name>","id":"<your device id>","user_id":<user id>,"is_connected":true,"ap":{"ssid":"<ssid>","mac":"<mac>","strength":"66","server_id":"<serverid>","socket_id":"<socketid>","status":"<status>"},"subscriptions":[],"subscribers":[],"input_interval_ms":750}$
$
$

- Here is the Python code:

import json
import requests

deviceId = "<deviceID>"
littleBitsUrl = "https://api-http.littlebitscloud.cc/devices/"
authToken = "<token>"

headers = {"Authorization": "Bearer "+authToken, "Accept":"application/vnd.littlebits.v2+json"}

r = requests.get(littleBitsUrl+deviceId, headers=headers)
print(r.text)

- Here is the output: 

$python CloudBit_Request.py
{"label":"<your device name>","id":"<your device id>","user_id":<user id>,"is_connected":true,"ap":{"ssid":"<ssid>","mac":"<mac>","strength":"66","server_id":"<serverid>","socket_id":"<socketid>","status":"<status>"},"subscriptions":[],"subscribers":[],"input_interval_ms":750}$
$

Happy coding!

Wednesday, July 1, 2015

RESTFul Testing Tools Postman and RequestBin

I have been writing Web API endpoints for the last few weeks. Unfortunately not in Python because the team uses another language. However, I came across two very useful free tools for testing my code, both on the client side and server side.

Client Side Postman Google Extension

This is a Chrome extension so you will need to use Google Chrome. But it is simple and flexible, add headers and bodies in different formats with a few clicks.


[Update: 02/21/2019: RequestBin link has been updated, thank you David!]

Server Side RequestBin.

It creates a private bucket to view what your request looks like on the Server side. The only complain I have is it lacks the environment variables you would get on the web server part. For that part, you can simply run a simple server in one of the public clouds, such as using Python Bottle / Flask framework in Azure.


Happy Coding!


Friday, June 5, 2015

Windows IoT on Raspberry Pi 2 - Part 1 Set Up

[Disclaimer: I work for Microsoft, but I try not to be biased :)]

[Update 7/21/2015: Regarding the reason why I did not see a output screen was because the device was operating in a headless mode. After changing the mode I was able to see the screen, which was important when starting to do builds. More information here]

I received an email about Windows IoT image being publicly available a few days ago and decided to give it a go. I basically followed the link below, which leads to other sites such as Windows 10 Preview and Visual Studio 2015 Preview links as the need arises. Save some time to complete all the steps, especially if you dont already have Windows 10 Preview.


http://ms-iot.github.io/content/en-US/GetStarted.htm


I wont repeat my installation steps, but instead will document what I saw different and some catcha's that was in my installation experience. If you are interested, I found at least one other post that shared their installation experience:


http://techcrunch.com/2015/04/30/how-to-install-windows-10-iot-on-your-raspberry-pi-2/#.vvglfg:5B1f


Notes I took:


1. The initial boot took a really long time after getting the image onto the board. So be patient. :) 
2. I didn't see a nice 'Windows 10 IoT Core Insider Preview screen like this, instead I just see a blue screen stating the IP address and basic information (below). 
3. My USB keyboard did not seem to work. I tried both a wireless keyboard/mouse combo that worked on other Raspberry Pi's as well as a wired one.
4. My HDMI monitor had distorted image (the image below was from a conference room projector). Plus my USB keyboard did not work, so I ended up using the 'App to Watch for IoT Boards on Your Network' to discover the board IP documented here (below). 
5. Initially when I entered the command to trust the local machine, I used LAN for the board and wirless for the PC, which did not work. If I put both on LAN, it discovered correctly and worked.
6. Remember to disable 'Use Authentication' in Visual Studio remote machine property. 

Working Blinky sample program:


The screens I saw during initial bootup: 


Windows IoT discovery program (right click on the device will bring up some access options):


Disable Use Authentication when specifying remote machine in VS2015:


In part 2, I would like to experiment with Python Tools for Visual Studio 2015 Preview.


Happy Coding!


Monday, May 18, 2015

PyInstaller for Converting Python Script to Windows Executables

I have always known about Py2Exe as a way to convert Python script to Windows executable. Recently I had a need to convert a simple Python FTP script to a Windows device. Py2Exe module did not work for me, searching for the error did not reveal too much information about the error itself, but rather another tool that 'just works'. The tool is called PyInstaller and at least for me, works out of the box. 

Here is my FTP script following this Stackoverflow post: http://stackoverflow.com/questions/24586016/

from pyftpdlib.authorizers import DummyAuthorizerfrom pyftpdlib.handlers import FTPHandlerfrom pyftpdlib.servers import FTPServer
authorizer = DummyAuthorizer()authorizer.add_user("user", "12345", ".", perm='elradfmwM')authorizer.add_anonymous(".",  perm='elradfmwM')
handler = FTPHandlerhandler.authorizer = authorizer
server = FTPServer(("0.0.0.0", 2121), handler)server.serve_forever()
Here is my conversation output:

> pyinstaller.exe .\my_ftp.py
31 INFO: wrote <path>\my_ftp\my_ftp.spec
47 INFO: Testing for ability to set icons, version resources...

In the dist folder of the newly created my_ftp folder will contain the .exe file. 

Happy coding! 


Friday, February 6, 2015

First day with Leap Motion Controller

I was pretty excited to receive my Leap Motion Controller last week, finally had some time to unbox it late last night and go thru the Python SDK HelloWorld example today.

I don't know how this can tie into Network engineering, perhaps we can build the network thru motion gestures like virtual lego? :)

Here is my knock off code of the tutorial, won't repeat what was already explained in detail on the page. The only difference is between line 14 to 16 that when detecting 10 fingers on the controller, it prints out the message, otherwise the screen sits idle:

    def on_frame(self, controller):
        frame = controller.frame()
        if len(frame.fingers) == 10:
            print "10 Little Monkeys Jumping on the Bed"


Here is a screenshot of the cool playground software that came with the controller. For the record, it tracks the hand to peel off a petal off the flower.


Here is the full code of the HelloWorld:

import sys
sys.path.insert(0, "./lib")
import Leap

from Leap import CircleGesture, KeyTapGesture, ScreenTapGesture, SwipeGesture

class SampleListener(Leap.Listener):
 
    def on_connect(self, controller):
        print "Connected"
        controller.enable_gesture(Leap.Gesture.TYPE_SWIPE);
 
    def on_frame(self, controller):
        frame = controller.frame()
        if len(frame.fingers) == 10:
            print "10 Little Monkeys Jumping on the Bed"
         
        #Some other things the frame can track
        #print "Frame id: %d, timestamp: %d, hands: %d, fingers: %d, tools: %d, gestures: %d" % (
        #          frame.id, frame.timestamp, len(frame.hands), len(frame.fingers), len(frame.tools), len(frame.gestures()))      

def main():
 
    listener = SampleListener()
    controller = Leap.Controller()
    controller.add_listener(listener)
 
    print "Press Enter to quit.."
    try:
        sys.stdin.readline()
    except KeyboardInterrupt:
        pass
    finally:
        controller.remove_listner(listener)
 
if __name__ == "__main__":
    main()
 

Happy coding!


Thursday, January 1, 2015

Basic Threading and Queueing

Happy 2015! Nothing like a fresh smell of Python script in the morning! :)

I wanted to get more practice on Threading and Queueing. So I went to my favorite site to look at standard library, Python Module of the Week, to look at some usage examples.

http://pymotw.com/2/threading/index.html#module-threading
http://pymotw.com/2/Queue/index.html#module-Queue

Here is the result:

#
# eric@pythonicneteng.com
# Reference: Python Module of the Week http://pymotw.com/
#

# Threading: http://pymotw.com/2/threading/index.html#module-threading
# Queue: http://pymotw.com/2/Queue/index.html#module-Queue

##########
# Step 1
# Basic Thread usage
import threading

def workers():
""" thread worker function """
print "hello "
return

thread = []
for i in range(5):
print "Thread " + str(i)
t = threading.Thread(target=workers)
thread.append(t)
t.start()
##########

##########
# Step 2
# Basic Queue usage
import Queue

q = Queue.Queue()

for i in range(5):
print "Putting item in Queu: " + str(i)
q.put(i)

while not q.empty():
print "Getting Queue"
print q.get()
##########

##########
# Step 3
# Combine Queue and Threading
switches = ["switch1", "switch2", "switch3"]

switchQueue = Queue.Queue()
for switch in switches:
print "Putting switches %s in Quque" % switch
switchQueue.put(switch)

def switchWorker(switch):
print "Working on: " + switch
return

print "\r\nStart to work on switches: "
threads = []
for switch in switches:
t = threading.Thread(target=switchWorker, args=(switch,))
thread.append(t)
t.start()

print "Done!\r\n"
##########

Here is the output of the script:

$python threadingPractice.py
Thread 0
hello
Thread 1
hello
Thread 2
hello
Thread 3
hello
Thread 4
hello
Putting item in Queu: 0
Putting item in Queu: 1
Putting item in Queu: 2
Putting item in Queu: 3
Putting item in Queu: 4
Getting Queue
0
Getting Queue
1
Getting Queue
2
Getting Queue
3
Getting Queue
4
Putting switches switch1 in Quque
Putting switches switch2 in Quque
Putting switches switch3 in Quque

Start to work on switches:
Working on: switch1
Working on: switch2
Working on: switch3
Done!

$

Happy Coding!


Tuesday, December 30, 2014

Black Hat Python Chapter 3 Scripts

I have been reading Black Hat Python, ISBN:978-1-59327-590-7 by No Starch Press. It is an excellent book and well worth the time invested in looking at the scripts. However, for the scripts in Chapter 3 I ran into issues running on 64-bit systems. On both of my Ubuntu Linux and Mac it first complains about grabbing at least 32 bytes of the packet, then it errors out on the IP class.

After some troubleshooting, it seems that the c_ulong on 64-bit systems are now 8-bytes instead of 4-bytes. I couldn't find an email address or link to report this issue, so I am just posting on my blog in case others run into the same issue.

The scripts are available on the book's website, http://www.nostarch.com/blackhatpython/. Again, it is well worth the money and time for the book, in my opinion.

Line 28 to 42:

class IP(Structure):
 
    _fields_ = [
        ("ihl",           c_ubyte, 4),
        ("version",       c_ubyte, 4),
        ("tos",           c_ubyte),
        ("len",           c_ushort),
        ("id",            c_ushort),
        ("offset",        c_ushort),
        ("ttl",           c_ubyte),
        ("protocol_num",  c_ubyte),
        ("sum",           c_ushort),
        ("src",           c_uint32),
        ("dst",           c_uint32)
    ]

try:
    while True:
     
        # read in a single packet
        raw_buffer = sniffer.recvfrom(65565)[0]
     
        # create an IP header from the first 20 bytes of the buffer
        ip_header = IP(raw_buffer[0:32])


Sunday, October 26, 2014

POX Wiki Android App

[6/23/2015 Update] Here are the latest statistics on the app about six months after publication:


***

I am learning Android programming with a class I am taking at UW Extension. The class is 10 weeks long and I wanted to come up with a project idea that I can work through out the class.

As such, I made an app that is pretty bare, to say the least. It is basically a webview of the POX Controller Wiki. I am hoping that through out the class I will be able to add more to it.

Here are the Java code that creates a webview and loads the page. The code includes allowing JavaScript and an additional method to allow the page to stay within the app after rendering to mobile layout.
public class LandingPage extends Activity {
    @Override
    protected void onCreate(Bundle savedInstanceState) {
        super.onCreate(savedInstanceState);
        setContentView(R.layout.activity_landing_page);
        WebView poxWiki = (WebView) findViewById(R.id.webview);
        poxWiki.setWebViewClient(new myWebViewClient());
        // Confluence renders page for mobile via JavaScript
        WebSettings webSettings = poxWiki.getSettings();
        webSettings.setJavaScriptEnabled(true);
        poxWiki.loadUrl("https://openflow.stanford.edu/display/ONL/POX+Wiki");
    }
    // Stays within app instead of call browser
    public class myWebViewClient extends WebViewClient {
        @Override
        public boolean shouldOverrideUrlLoading(WebView view, String url){
            view.loadUrl(url);
            return true;
        }
    }

Here are some screenshots of the store.


Wednesday, July 2, 2014

Small Script to Fetch Bing search results

I have been playing with Tableau software for some data visualization practices. Thought it might be interesting if I can pull some Internet data. Looked around for some examples, and found a good one on http://www.guguncube.com/2771/python-using-the-bing-search-api. Unfortunately it seems that Bing changed its base URL and some of the minor formatting. Some quick edits was all it took to get the script up and running.

It is very nice that Bing gives you 50,000 queries per month for free. You can get your API key here, https://datamarket.azure.com/.

Here is the script:

#!/usr/bin/env python
# Modified from http://www.guguncube.com/2771/python-using-the-bing-search-api
#
# by Eric Chou
# eric@pythonicneteng.com

import urllib
import urllib2
import json
def main():
    query = "Python Newtork Engineering"
    response = bing_search(query, limit=10)
    #Raw print json.loads(response)['d']['results']
    #Title
    print "The top 10 results for your query " + query + ":"
    for i in json.loads(response)['d']['results']:
        print i['Title']

def bing_search(query, limit=5, **kwargs):
    key = 'YOURKEY'
    baseURL = 'https://api.datamarket.azure.com/Bing/SearchWeb/'
    limit = str(limit)
    query = urllib.quote(query)
    # create credential for authentication
    user_agent = 'Mozilla/4.0 (compatible; MSIE 7.0; Windows NT 5.1; Trident/4.0; FDM; .NET CLR 2.0.50727; InfoPath.2; .NET CLR 1.1.4322)'
    credentials = (':%s' % key).encode('base64')[:-1]
    auth = 'Basic %s' % credentials
    url = baseURL+'Web?Query=%27'+query+'%27&$top='+limit+'&$format=json'
    request = urllib2.Request(url)
    request.add_header('Authorization', auth)
    request.add_header('User-Agent', user_agent)
    request_opener = urllib2.build_opener()
    response = request_opener.open(request) 
    response_data = response.read()
    return response_data
if __name__ == "__main__":
    main()
Here is the output of the script:

$ python bingSearch_v1.py
The top 10 results for your query Python Newtork Engineering:
Python for Network Engineering | Facebook
Python for Network Engineers
Jeremy Filliben: Python Programming and the Network Engineer
Show 176 - Intro to Python & Automation for Network ...
Python For Network Engineers | Networking-Link
First Post! | Python for Network Engineers
Python For Scientific Engineering - OpenOpt
World News - Python Engineer
Network Test Engineer Python Jobs, Employment | Indeed.com

Happy Coding!

Saturday, May 17, 2014

[Book Review] Hacking: The Art of Exploitation

This is a book review for Hacking: The Art of Exploitation.

As the book mentioned, hacking is the creative art of problem solving. By that spirit, anybody who tries to solve a problem beyond the original intent of the object could be consider hackers. Hacking with computers is a craft that sometimes misunderstood by many, especially after some of the portraits in media. The book takes this dense subject and breaks it down into small pieces that assumes no prior knowledge of the subject. The seven main topics includes programming,  exploitation, networking, shellcode, countermeasures, and cryptology.

The text is pretty dense because the subject is dense. As someone who is interested in the topic but do not code for food, I read the introduction to get an overview of the concept and try out a few codes, knowing where to go back to if I need it in a future date. To that extend, this books serves my purpose well. I was especially interested in chapter 4 on the topics of Networking. There are many high level tools that achieves the programs in the chapters do (Hping, Scapy) for Syn Flood, port scanning, etc. But it is very useful to see the low level code.

Overall, I think this is a great book on the topic as many have pointed out on the various book review forums.

Saturday, April 5, 2014

Thumbs Up for Python Requests Package

On Reddit Python board, user Lukasa (correctly) pointed out that my A10 Script in posts A10 aXAPI Part 1 and A10 aXAPI Part 2 would be much shorter with Python Requests package instead of using standard library. As much as I'd like to stick with just the standard libraries, after all, 'batteries included' is one of the beautiful things with Python; after playing around with it a little bit, I totally wish I had used it earlier. "HTTP for Humans", sure, sign me up!

The main reason for me to try this out was to code against the new A10 ACOS3.0 API. I am more than happy to share the code, but ACOS3.0 is currently in EA, so I will share the examples once it is in GA and the Python SDK released.

In the mean time, the Requests Quick Start guide is one of the best I have seen. That was all I needed to get going. Below are repeating some of the quick start examples, it is worth pointing out that I did have the use the 'verify=False' option to bypass the SSL cert error. Honestly, a lot of them are pretty self-explanatory.. 'http for humans'. Ha!

>>> import requests
>>> r = requests.get('https://github.com/timeline.json', verify=False)
>>> r.text
u'[{"created_at":"2014-04-01T18:31:39-07:00","payload":{"ref":"Create-Properties-Dir","ref_type":"branch","master_branch":"master","description":"The Omniwallet is a new type of web wallet that combines security, usability and multi-currency support.","pusher_type":"user"},"public":true,"type":"CreateEvent",”url"
<skip>
>>> r.encoding
'utf-8'
>>>
>>> r = requests.post("http://httpbin.org/post")
>>>
>>> r = requests.put("http://httpbin.org/put")
>>> r = requests.delete("http://httpbin.org/delete")
>>> r = requests.head("http://httpbin.org/get")
>>> r = requests.options("http://httpbin.org/get")
>>>
** Request with Key:Value in Payload **

>>> payload = {'key1': 'value1', 'key2': 'value2'}
>>> r = requests.get("http://httpbin.org/get", params=payload)
>>> r.text
u'{\n  "args": {\n    "key1": "value1",\n    "key2": "value2"\n  },\n  "headers": {\n    "Accept": "*/*",\n    "X-Request-Id": "ec23d3c0-86fa-43cd-8d4f-6c5f71041b70",\n    "User-Agent": "python-requests/2.2.1 CPython/2.7.3 Darwin/13.1.0",\n    "Accept-Encoding": "gzip, deflate, compress",\n    "Host": "httpbin.org",\n    "Connection": "close"\n  },\n  "url": "http://httpbin.org/get?key2=value2&key1=value1",\n  "origin": "216.9.0.16"\n}'
>>> import json
>>> r.json()
{u'url': u'http://httpbin.org/get?key2=value2&key1=value1', u'headers': {u'X-Request-Id': u'ec23d3c0-86fa-43cd-8d4f-6c5f71041b70', u'Accept-Encoding': u'gzip, deflate, compress', u'Connection': u'close', u'Accept': u'*/*', u'User-Agent': u'python-requests/2.2.1 CPython/2.7.3 Darwin/13.1.0', u'Host': u'httpbin.org'}, u'args': {u'key2': u'value2', u'key1': u'value1'}, u'origin': u'216.9.0.16'}
>>> r.content
'{\n  "args": {\n    "key1": "value1",\n    "key2": "value2"\n  },\n  "headers": {\n    "Accept": "*/*",\n    "X-Request-Id": "ec23d3c0-86fa-43cd-8d4f-6c5f71041b70",\n    "User-Agent": "python-requests/2.2.1 CPython/2.7.3 Darwin/13.1.0",\n    "Accept-Encoding": "gzip, deflate, compress",\n    "Host": "httpbin.org",\n    "Connection": "close"\n  },\n  "url": "http://httpbin.org/get?key2=value2&key1=value1",\n  "origin": "216.9.0.16"\n}'
>>>

*** Construct Image from binary return object **

>>> from PIL import Image
>>> from StringIO import StringIO
>>> i = Image.open(StringIO(r.content))

*** Raw content ***

>>> r = requests.get('https://github.com/timeline.json', stream=True, verify=False)
>>> r.raw
<requests.packages.urllib3.response.HTTPResponse object at 0x2f255b0>
>>> r.raw.read(10)
'\x1f\x8b\x08\x00\x00\x00\x00\x00\x00\x03'
>>>

Happy Coding! 


Saturday, February 8, 2014

[Product Review] Raspbery Pi Cookbook Video

This is a product review for the Raspbery Pi Cookbook Video.

As they say, "Seeing is Believing", there is something to be said about a seeing something being done rather than reading about it. Perfect companion for the cookbook, in my opinion.

I reviewed the cookbook when it was in early draft and liked it very much. At the time, I honestly thought that it would be great if I can just see demonstrate of some of the recipes. Apparently I am not alone. Personally I believe if you have some experience with Raspberry Pi you will still get value out of the video, but it is best to be used with the cookbook so one can read about the recipe and reinforce the idea with the video.

Just like the cookbook, the video works from simple to more complex recipes. Some recipes builds on top of each other, but not much.

Overall, I believe if you like the cookbook, you will enjoy the video.

[02/16/2014]

Here is a video for a mashup for "Recipe 04.09 Raspberry Pi Radio Transmitter". The idea is to tail /var/log/syslog, upon finding a suitable event, play the sound.


Here is the code:

#!/usr/env/bin python
#
# Eric Chou ericc@a10networks.com
# Fred Hsu fredlhsu@aristanetworks.com
# http://www.icrobotics.co.uk/wiki/index.php/Turning_the_Raspberry_Pi_Into_an_FM_Transmitter
#
# Feb. 16, 2014
#
# The purpose of the file is to tail the syslog, upon finding a suitable event
# the device will push out the directflow to the Arista switch and transmit
# a FM radio sound to indicate triggered event.
#

import subprocess, time, re
from jsonrpclib import Server

p = subprocess.Popen('tail -f /var/log/syslog', shell=True, stdout=subprocess.PIPE, stderr=subprocess.STDOUT)

# Sets Arista API call parameters
username = "admin"
password = "admin"
switch = "172.22.28.156"
dip = "10.1.1.1"
outport = "Port-Channel 100"
urlString = "https://{}:{}@{}/command-api".format(username, password, switch)
switchReq = Server( urlString )

# Tails syslog and look for the re expression
while True:
    line = (p.stdout.readline()).strip()
    if re.search('vThunder-2', line):
        print "Found Event: ", line
        print "Pushing Direct Flow out to Arista switch", switch
        # The following rpc request will match on the source IP, then punts traffic to output port
        #response = switchReq.runCmds( 1, ["enable", "configure", "openflow", "flow a10", "persistent", "match destination ip {}".format(dip), "action set output interface {}".format(outport)] )
        subprocess.call(['./pifm', 'starwars.wav', '103.0']) #make sure pyfm available

Happy scripting with Raspberry Pi!


Sunday, January 19, 2014

[Book Review] Investigating Internet Crimes

This is a book review for Investigating Internet Crimes, ISBN 0124079296.

This book is an overview on what the title suggested, investigating Internet crimes. With such a broad topic, it generally covers each topic briefly to be 'up and running' with lots of reference links at the end of the chapter. It covers all the major topics, from the alphabet soups of security agencies, to how the Internet works, to collecting and making court-sustaining digital footprint. It even has a page for 'Chat Acronyms' such as BRB, LOL, and text emoticons. It actually brings a smile to my face thinking some 40-yr old cop studying that emoticon page in some dimly lightly backroom trying to catch the bad guys.

As an IT professional, many of the topics such as IP address, DHCP, MAC address, and tools related to Ping, Traceroute were already familiar to me. What was really useful, was the introduction of legally admissible evidence, the different state and federal jurisdictions, and documenting online evidences. It was also handy to be introduced to some of the companies and tools geared toward this particular purpose, such as WebCase and PortableApps.com. The books tries to cover both free and commercial tools, with a bit of a bias toward free tools.

I believe this is a handy book to have, take some of the chapters as 'good to know', while treating some of the chapters more in depth, reading the references at the end. As with many projects, picking the right tools was half of the battle, getting started was sometimes cumbersome, and this book serves as a good starting point for anybody interested in the topic.


Monday, January 13, 2014

[Book Review] SDN: Software Defined Networks

This is a book review for SDN: Software Defined Networks.

Overall, I believe the book has done an excellent job covering most of the Software Defined Networking topics, perhaps sacrificing depth in terms of the breadth of topic coverage. I think the authors would be the first to agree that it is an impossible task to do both, therefore they made a choice to cover most topics without drilling too deep into them.  

As a network engineer by trade for the last 14 years, I, as well as others feel that the Software Driven (or Defined) Networking is the biggest shift in mindset and technology in the last decade. The winners of this movement is sure to dominate the market for years to come. As such, there is a lot of buzz and movement surrounding the umbrella term of ‘SDN’. It is almost mind blowing to see the pace of change at each and all of the projects. OpenStack, for example, has moved on from Quantum to Neutron in such short months since publication, which contains no small change, mind you. So the readers should keep in mind that any written book would be out-of-date by the time it is done. This should be treated as a starting point that is like sampling the food at a buffet, but to sink your teeth into a particular topic, you have to spend more time diving into that particular topic. 

As a reader, I come funnily anticipated looking the lenses of the authors on the topic at hand. If there is any suggestions, I would appreciate the book to be more focused on topics that the authors feel might be more important. It does not need to be correct as there is probably no right or wrong answer, but at least thru the supporting points we can understand the analytical process of the author. For example, VxLAN vs NVGRE, OpenStack vs. CloudStack, OpenFlow vs. Hybrid; tell us what you believe will prevail with supporting thesis. This is especially important in an emerging market such as SDN, where a new consortium seems to be forming by the week.  

In conclusion, I feel the book is a fantastic starting point for any interested party to start diving into this exciting new world of SDN. Happy reading. 


Tuesday, December 31, 2013

Project: Mining the Social Web 2nd Edition - Part 2

This is the part 2 of my experience trying out and experimenting with the code in Mining the Soical Web 2nd Edition. This covers Chapter 1 to Chapter 3 (Twitter, Facebook, LinkedIn).

A couple of thoughts so far:

1. The author is really dedicated to his book and audience, evident in his responsiveness in answering my question (#7 below).
2. The VM experience is totally awesome.
3. Each of the topic covered can be expanded into a whole book by itself. We are scratching only the surface.
4. For me, when writing a script on a new topic, finding the right library is typically half of the battle. Nothing is more frustrating when you are already going down the path of using a library only to find a better one (or worse, nothing at all). The book gave you a nice list of best-of-breed libraries for each topic, which in itself is worth every penny of buying the book.

Here is more detail about my experience:

1. I reran the exercise I did in previous post via IPython notebook via the VM. The three top trending corresponds to the bombing in Russia and the NFL game that was on at the time:

2013-12-29T18:48:48Z
set([u'AJ Green', u'Volgograd', u'Andy Dalton'])

2.  I ran the rest of the code from the VM because I was short on time:

+----------------+-------+
| Screen Name    | Count |
+----------------+-------+
| justinbieber   |     6 |
| Kid_Charliej   |     2 |
| Cavillafuerte  |     2 |
| touchmestyles_ |     1 |
| aliceorr96     |     1 |
| gymleeam       |     1 |
| fienas         |     1 |
| nayely_1D      |     1 |
| angelchute     |     1 |
+----------------+-------+
3. I was really glad I used virtualenv to isolate each of the chapters as each of them reuqire a different Python package. There was no problem installing any of the packages and run the scripts that I tried on the Win8.1 platform.
4. Facebook Graph API is a beast. It really require more reading and understanding in order to fully grasp the depth and what you can do with it. Here is a partial list of my friend's top interest list: 

Top likes amongst friends
+----------------------------------------+------+
| Name                                   | Freq |
+----------------------------------------+------+
| Amazon.com                             |    9 |
| Python for Network Engineering         |    5 |
| George Takei                           |    4 |
| West Seattle Rolfing                   |    4 |
| Photography on Facebook                |    3 |
| Music on Facebook                      |    3 |
+----------------------------------------+------+
5. D3 looks really awesome, but there is a learning curve to it that I will need to come back to. 

6. For the first 2 LinkedIn scripts, I have decided to break the second one into a more readable list comprehension. For me, I think if the List Comprehension goes into 2-degree deep, I'd like to break them apart:

     1. First file to get the connection file:

from linkedin import linkedin
import json

consumer_key = ''
consumer_secret = ''
user_token = ''
user_secret = ''

return_url = ''

auth = linkedin.LinkedInDeveloperAuthentication(consumer_key, consumer_secret,
     user_token, user_secret, return_url,
     permissions=linkedin.PERMISSIONS.enums.values())

app = linkedin.LinkedInApplication(auth)

# Get you own profile
#print app.get_profile()

# Getting connections as a ego point
#print app.get_connections()

# A good idea to get connections and store them in file to save API calls
connections = app.get_connections()
f = open('linkedin_connections.json', 'w')
f.write(json.dumps(connections, indent=1))
f.close()

for line in open('linkedin_connections.json', 'r'):
     print line

     2. Second file to do the parsing: 

from prettytable import PrettyTable
import json

f = open('linkedin_connections.json', 'r')
connections = json.loads(f.read())
f.close()

# PrettyTable Print
pt = PrettyTable(field_names=['Name', 'Location'])
pt.align = 'l'

for c in connections['values']:
     if c.has_key('location'):
          pt.add_row([c['firstName'] + ' ' + c['lastName'], c['location']['name']])

print pt
 7. I got stuck under the CSV file export portion, turns out the path should be ipynb/resources/<blah> instead of just resources/<blah>. More details on the book Facebook page: https://www.facebook.com/MiningTheSocialWeb/posts/594068610648372?comment_id=5203748&reply_comment_id=5204030&offset=0&total_comments=16&notif_t=feed_comment.

I am enjoying the experience very much and feel like I am learning a lot. Again, the biggest difference for me is the author's dedication to his audience as well as the VM experience.

Happy coding!