It is in my intention that for the second edition, I am going to document my experience and any caveats that I experienced. A couple of notes:
- Mac has been my preferred platform for the last few years, but I am trying to get familiar with Windows 8.1 and recently got a Surface Pro 2. So I am going to conduct the whole project on the device, including writing the blogs.
- I will try to do as much coding on my own machine as possible to gain muscle memory and only use the VM to compare results and when I get stuck. But I want to stress that I think having this nice frozen development VM is so cool and priceless.
- I already have Enthought's Canopy Express installed and that is my default Python environment. I find that the least painful way to get IPython, Matplotlib, SciPy, and NumPy on a Windows box.
Ok, enough talking, let's get started.
Step 1. Prep the VM Experience
Following the instruction on this page, I'd imagine it is pretty painless for most. I, however, ran into an issue with an error I received from Vagrant about 'VT-x not enabled' and therefore VirtualBox VM cannot be started. A bit of research yield this blog post about running Hyper-V and VirtualBox at the same time (http://derekgusoff.wordpress.com/2012/09/05/run-hyper-v-and-virtualbox-on-the-same-machine/). Hyper-V came with Windows 8.1 Pro, but I don't think it is enabled by default. It is probably worth knowing that this is an issue, however. Also a note that using PowerShell to execute the 'bcdedt' boot manager command did not work, even in administrative mode. A regular command line with admin right was needed for me.
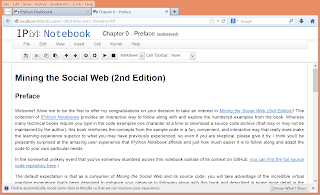
It took longer than expected but at last, it is up for me:
Step 2. Chapter 1 Twitter
For isolation on the experiment code, I am creating VirtualEnv, more information on my steps here.
> easy_install-2.7.exe pip
> pip-2.7.exe install virtualenv
Downloading/unpacking virtualenv
Downloading virtualenv-1.10.1.tar.gz (1.3MB): 1.3MB downloaded
Running setup.py egg_info for package virtualenv
<skip>> pip-2.7.exe install virtualenv
Downloading/unpacking virtualenv
Downloading virtualenv-1.10.1.tar.gz (1.3MB): 1.3MB downloaded
Running setup.py egg_info for package virtualenv
Successfully installed virtualenv
Cleaning up...
>
Cleaning up...
>
Starting to environment, I also change the PS execution policy:
> Set-ExecutionPolicy RemoteSigned
Execution Policy Change
The execution policy helps protect you from scripts that you do not trust. Changing the execution policy might expose
you to the security risks described in the about_Execution_Policies help topic at
http://go.microsoft.com/fwlink/?LinkID=135170. Do you want to change the execution policy?
[Y] Yes [N] No [S] Suspend [?] Help (default is "Y"): y
>
> virtualenv-2.7.exe twitter
Using base prefix \\Enthought\\Canopy\\App\\appdata\\canopy-1.1.0.1371.win-x86_64'
New python executable in twitter\Scripts\python.exe
Installing Setuptools..............................................................................................
...................................................................................................................
.......................done.
Installing Pip.....................................................................................................
...................................................................................................................
.....................................................................................................done.
> .\twitter\Scripts\activate.ps1
(twitter) >
(twitter) >
(twitter) >
(twitter) >
Step 3. Create Twitter developer account. No surprise here.
Step 4. Finally, some code and result.
After a few hours from starting, I finally can start writing code. Here I combine the exercise 1.1 to 1.4 and received the current and world trend at this time (UFC168 was the trending topic tonight):
import twitter
import jsonconsumer_key = ''
consumer_secret = ''
oauth_token = ''
oauth_token_secret = ''auth = twitter.oauth.OAuth(oauth_token, oauth_token_secret, consumer_key, consumer_secret)twitter_api = twitter.Twitter(auth=auth)#print twitter_api# Yahoo GeoID: http://developer.yahoo.com/geo/geoplanet/world_woe_id = 1
us_woe_id = 23424977# same api call as https:// api.twitter.com/1.1/trends/place.json?id=1
world_trend = twitter_api.trends.place(_id=world_woe_id)
us_trend = twitter_api.trends.place(_id=us_woe_id)#print json.dumps(world_trend, indent=1)
#print ("*****")
#print json.dumps(us_trend, indent=1)world_trend_set = set([trend['name'] for trend in world_trend[0]['trends']])
us_trend_set = set([trend['name'] for trend in us_trend[0]['trends']])common_trends = world_trend_set.intersection(us_trend_set)print common_trends
Here is the result:
> python .\Ex1-1.py
set([u'Uriah Hall', u'Travis Browne', u'#UFC168'])
set([u'Uriah Hall', u'Travis Browne', u'#UFC168'])
>
Wow, that was fun! Even just 20 pages into the book, I can tell this is going to be an enjoyable experience, I only wish I have more time to experiment.
Stay tuned. Happy coding.

Thanks for sharing! I'm excited to follow along with your experiences as you work through things, especially since you are using Windows 8, and that's a platform that I'm not terribly familiar with.
ReplyDeleteIt's kind of buried under "Troubleshooting" in the Appendix A notebook - http://nbviewer.ipython.org/github/ptwobrussell/Mining-the-Social-Web-2nd-Edition/blob/master/ipynb/_Appendix%20A%20-%20Virtual%20Machine%20Experience.ipynb - but now that you mention it, I did have some info on the "VT-x" errors that you mentioned. I don't think I ever fully understood the root cause (or even what Hyper-V really was), so your report here has already helped me to get a better understanding of that problem.
Thanks again for posting this. Looking forward to the next segment...
Right! Thanks. I guess only one Hypervisor can use CPU hardware assist at a time and Hyper-V just takes over upon bootup in Win8 when enabled. I have ran VMPlayer and VIrtualBox on the same device with no problem before. Pretty edge case but glad I can move on. Thanks for reading, BTW. :)
Delete